Using GitHub Actions and Hosted Runners


Published on 24 February 2022 by Andrew Owen (6 minutes)
You’ve probably heard of DevOps. You’re probably aware of the term CI/CD (continuous integration and delivery). But if not, the TL:DR is:
And DevOps simply means integration between development and operations. With this approach, the software lifecycle is:
In the integration phase, automated testing shows if the software is broken when new code is merged into the main branch.
The delivery phase ensures that the software is always in a state of ‘ready to release’. The deployment phase automates the process of putting the software into production.
The aim of all of this is to deliver code changes frequently with confidence, typically as part of an Agile Software Development approach. There are many articles online going into great depth on the subject, including one from InfoWorld.
For automatic build and testing, historically you would’ve used a local build server. Now it’s more likely to be a Docker container running on Kubernetes container orchestration infrastructure in a hosted cloud provided by Amazon, Google or Microsoft. This is great if you have an entire DevOps team at your disposal. But if you’re not already familiar with Kubernetes, it has a steep learning curve. Depending on the scale of your project, there may be a simpler alternative.
Enter GitHub Actions and GitHub-hosted runners (other providers like GitLab offer equivalent functionality and there are entire standalone offerings that integrate with Git such as Cirrus CI). Actions are scripts that can be automated or triggered manually. You can get to them from the Actions menu. If you use GitHub pages to host a website for your project, then you’ll see pages-build-deployment listed under workflow.
Runners are virtual machines (VMs) spun up to run a script and then spun down again. GitHub offers Linux, Windows and macOS VMs (priced in that order). Open source projects get a certain amount of free monthly credit to use. If you’re paying for use, it’s worth shopping around.
GitHub provides many pre-configured scripts and makes suggestions based on its analysis of the code in your repository. These are fairly easy to configure. But if an off-the-shelf solution isn’t suitable, you can create your own. From Actions, click New workflow and then click set up a workflow yourself. You’ll get the standard YAML template:
# This is a basic workflow to help you get started with Actions

name: CI

# Controls when the workflow will run
on:
  # Triggers the workflow on push or pull request events but only for the main branch
  push:
    branches: [ main ]
  pull_request:
    branches: [ main ]

  # Allows you to run this workflow manually from the Actions tab
  workflow_dispatch:

    # A workflow run is made up of one or more jobs that can run sequentially or in parallel
    jobs:
      # This workflow contains a single job called "build"
      build:
        # The type of runner that the job will run on
        runs-on: ubuntu-latest

        # Steps represent a sequence of tasks that will be executed as part of the job
        steps:
          # Checks-out your repository under $GITHUB_WORKSPACE, so your job can access it
          - uses: actions/checkout@v4

          # Runs a single command using the runners shell
          - name: Run a one-line script
            run: echo Hello, world!

          # Runs a set of commands using the runners shell
          - name: Run a multi-line script
            run: |
              echo Add other actions to build,
              echo test, and deploy your project.
By default, it creates this file as <repository>/.github/workflows/main.yml.
GitHub’s Ubuntu environment has a lot of the tools you may need pre-installed, including Java and Perl. But if the tool you need is missing and a package exists for it you can add the line sudo apt install<package> without having to specify a password. You can add external software repositories to the Ubuntu VM, but if the tool isn’t in one of those the simplest solution is to add an x86 or x64 Linux binary to your source repository.
This is the build script of SE Basic IV:
name: build
on:
  push:
    branches: [ main ]
  pull_request:
    branches: [ main ]
  workflow_dispatch:
    jobs:
      build:
        runs-on: ubuntu-latest
        permissions:
          contents: write
        steps:
          - uses: actions/checkout@v4
          - name:
            run: |
              cd basic
              ../rasm/rasm-deb-i386 -pasmo basic.asm -ob ../bin/23.bin -sz -os ../bin/symbols.txt
              cd ../boot
              ../rasm/rasm-deb-i386 -pasmo boot.asm -ob ../bin/boot.rom
              rm basic.bin
              cp ../bin/boot.rom ../ChloeVM.app/Contents/Resources/se.rom
              cat ../bin/basic.rom >> ../ChloeVM.app/Contents/Resources/se.rom
              cd ../rasm
              ./rasm-deb-i386 firmware.asm -ob ../bin/FIRMWA~1.BIN
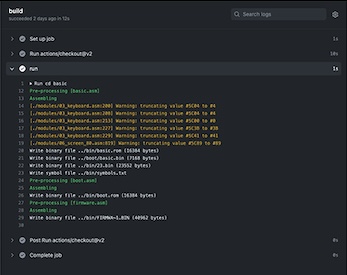
Whenever there is a push or pull in the main branch the script is triggered. It can also be manually triggered. It runs on Ubuntu. It has a dependency that isn’t part of the OS: the Z80-cross assembler RASM. Fortunately, I already had an x86 build in the repo from when I was planning to use my NAS drive as a build server.
The script replicates the functionality of the VScode tasks. It builds the BASIC interpreter. Then it builds the boot ROM. It then assembles the combined ROM and builds the firmware (which includes a checksum). As far as testing goes, this is fairly limited. The main thing it will catch is if a newly added section of code causes the code to overflow the following code area. But if anything does break the build, it’s immediately obvious from looking at the actions logs.
Having got the build script working, I added actions to build and deploy an API portal, generate code pages from a single Unicode font file and convert language strings from UTF-8 in a JSON file to packed data for the appropriate code page. I’ll cover these in detail in future articles.